
A Comprehensive Guide on GraphQL Testing
GraphQL has taken the API world by storm, offering flexibility and efficiency like never before. But with great power comes great responsibility, and ensuring your GraphQL API functions flawlessly is crucial. This comprehensive guide will equip you with the knowledge to master the art of GraphQL testing.
What is GraphQL
GraphQL is an open-source query language that describes how a client should request information through an API. In a broad sense, GraphQL is a syntax developers can use to ask for specific data and return that data from multiple sources. Once the client defines the structure of the data needed, the server returns data using the identical structure.
GraphQL is a query language and server-ride runtime for APIs that allows clients to request multiple resources via types and fields.
Let’s break this down piece by piece.
GraphQL is a language for querying data. Unlike most query languages (such as SQL), you don’t use GraphQL to query a particular type of data store (such as a MySQL database). Instead, you use GraphQL to query data from any number of different sources.
What is GraphQL compared to REST?
GraphQL came out as the solution to a more fluent and customized way for complex API data retrieval. With traditional REST, the large number of requests and endpoints add complexity and redundant data to API interactions.
Here’s how requests look under REST vs GraphQL. We’ll use the use case of interacting with a post on a social media platform:
REST: Multiple endpoints

GraphQL: Single endpoint

The basic idea behind GraphQL is mutations and queries that specify and retrieve exactly the data you need and nothing else.
Here’s an example of a GraphQL query and mutation.


| Query | Mutation |
query { findAllBooks { id title isbn pageCount author { id firstName lastName } } } |
mutation { deleteBook(id:3) } |
The Queries that fetch data are synonymous to GET calls in REST, while mutations signal that we’d like to invoke a change in the system, similar to REST’s POST or DELETE methods.
Common GraphQL security test cases
GraphQL API vulnerabilities often happen due to implementation and design flaws. Such a case would be if the introspection feature is left active, which will enable an attacker to query API and enumerate its schema which can lead to more severe consequences.
Universal Query
To successfully test for GraphQL Vulnerabilities we first need to find the GraphQL endpoint, since all the requests are reaching one endpoint. If you send query{__typename} to any GraphQL endpoint, it will include the string {“data”: {“__typename”: “query”}} somewhere in its response. This is known as a universal query, and is a useful tool in probing whether a URL corresponds to a GraphQL service.
The query works because every GraphQL endpoint has a reserved field called __typename that returns the queried object’s type as a string.
Common endpoint names
GraphQL services usually use the same endpoint suffixes. So when we are sending Universal Queries to test for the GraphQL API we should check these common endpoint names:
- /graphql
- /api
- /api/graphql
- /graphql/api
- /graphql/graphql
If some of these endpoints don’t return the response that we are expecting from sending a Universal query we can try to append /v1 to the path.
Request methods
The next step in trying to find GraphQL endpoints is to test using different request methods.
It is best practice for production GraphQL endpoints to only accept POST requests that have a content-type of “application/json”, as this helps to protect against CSRF vulnerabilities. However, some endpoints may accept alternative methods, such as GET requests or POST requests that use a content-type of “x-www-form-urlencoded”.
If you can’t find the GraphQL endpoint by sending POST requests to common endpoints, try resending the universal query using alternative HTTP methods.
Discovering schema information
Once we already identified the GraphQL endpoint and we sent a couple of requests to examine responses we can start enumerating the schema of the database.
To do so we can start sending introspection queries. Introspection is a built-in GraphQL function that enables you to query a server for information about the schema.
Introspection will allow us to understand more about the database and sometimes will leak sensitive information such as description fields.To use introspection we can query the __schema field.(if the introspection is available we will get response containing all available queries)
query={__schema{types{name,fields{name}}}}
Testing GraphQL nodes is not very different from testing other API technologies. Consider the following steps:
Introspection Queries:
Introspection queries are the method by which GraphQL lets you ask what queries are supported, which data types are available, and many more details you will need when approaching a test of a GraphQL deployment.
The GraphQL website describes Introspection:
“It’s often useful to ask a GraphQL schema for information about what queries it supports. GraphQL allows us to do so using the introspection system!”
There are a couple of ways to extract this information and visualize the output, as follows.
Using Native GraphQL Introspection
The most straightforward way is to send an HTTP request (using a personal proxy) with the following payload:

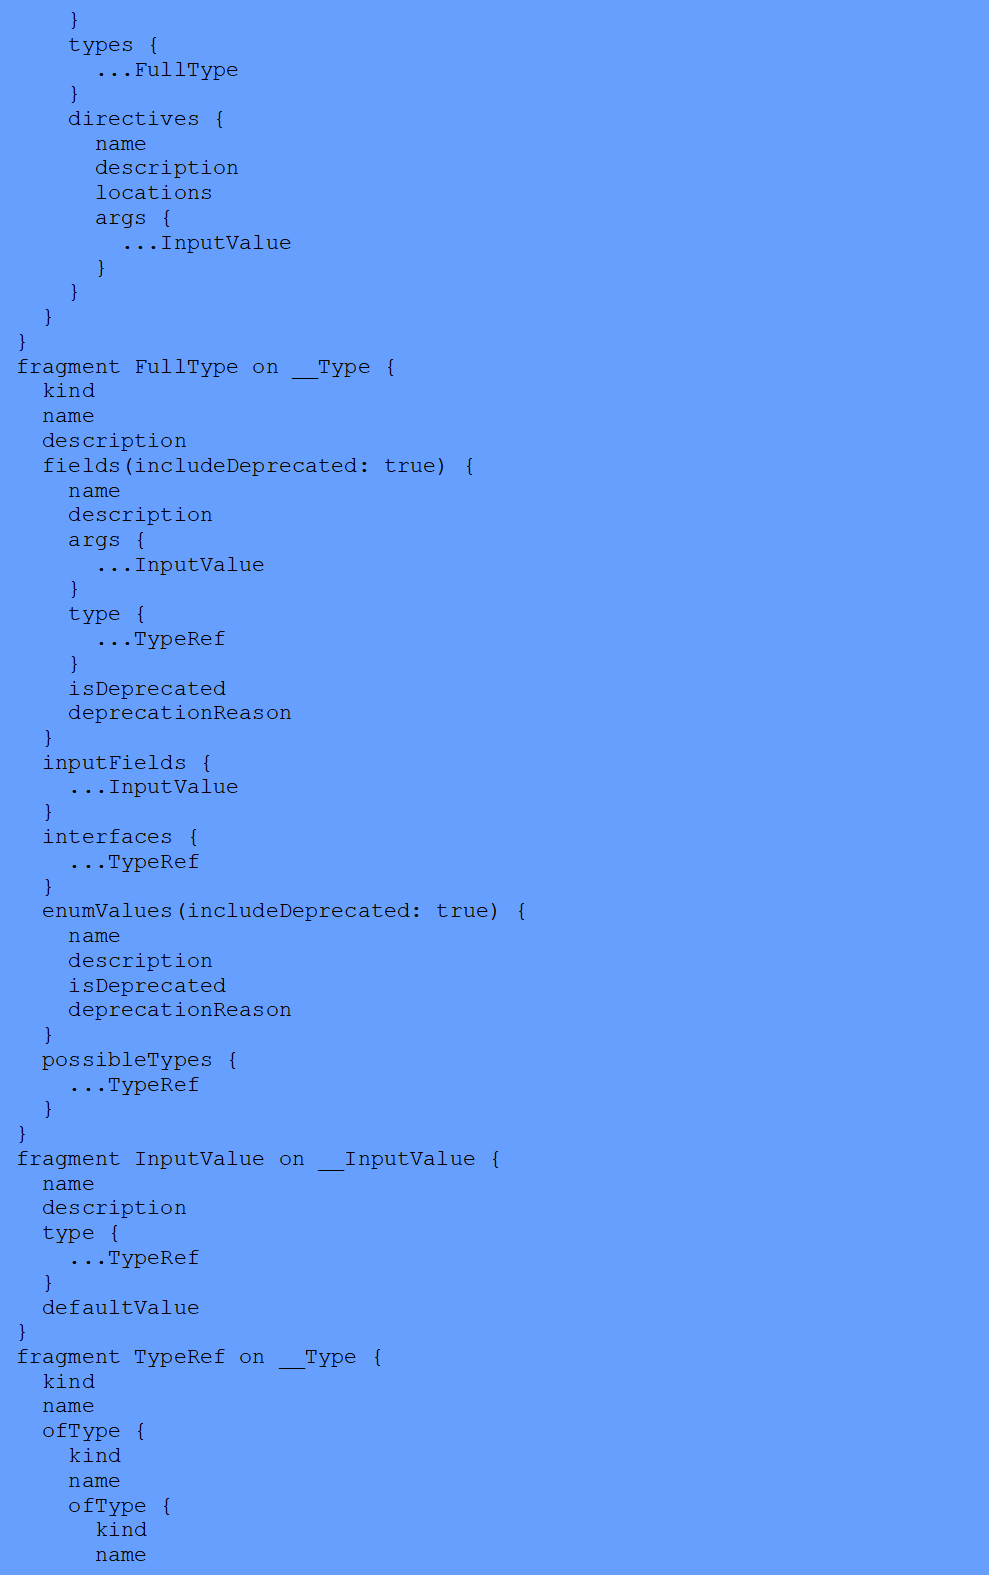
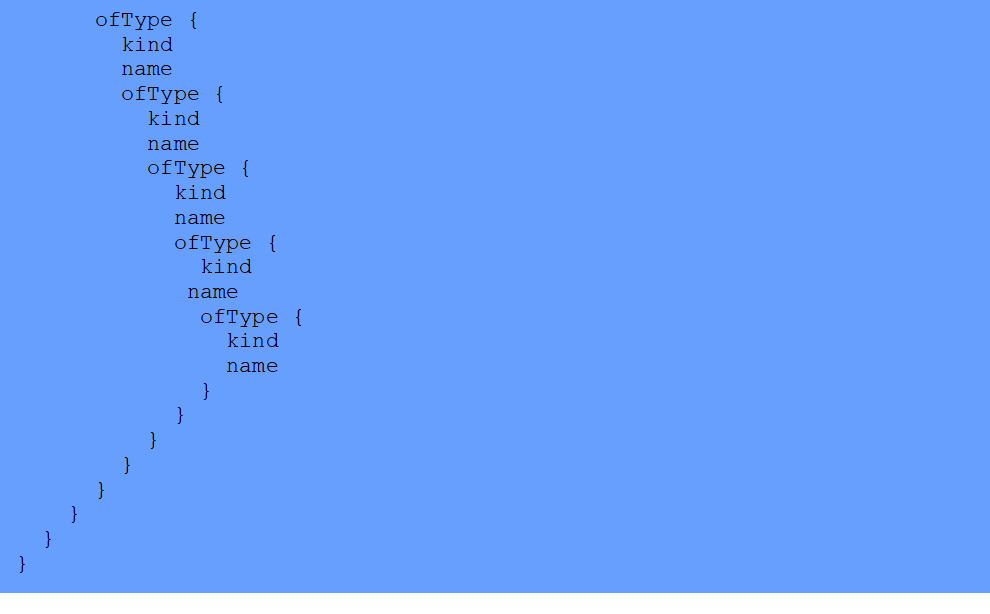
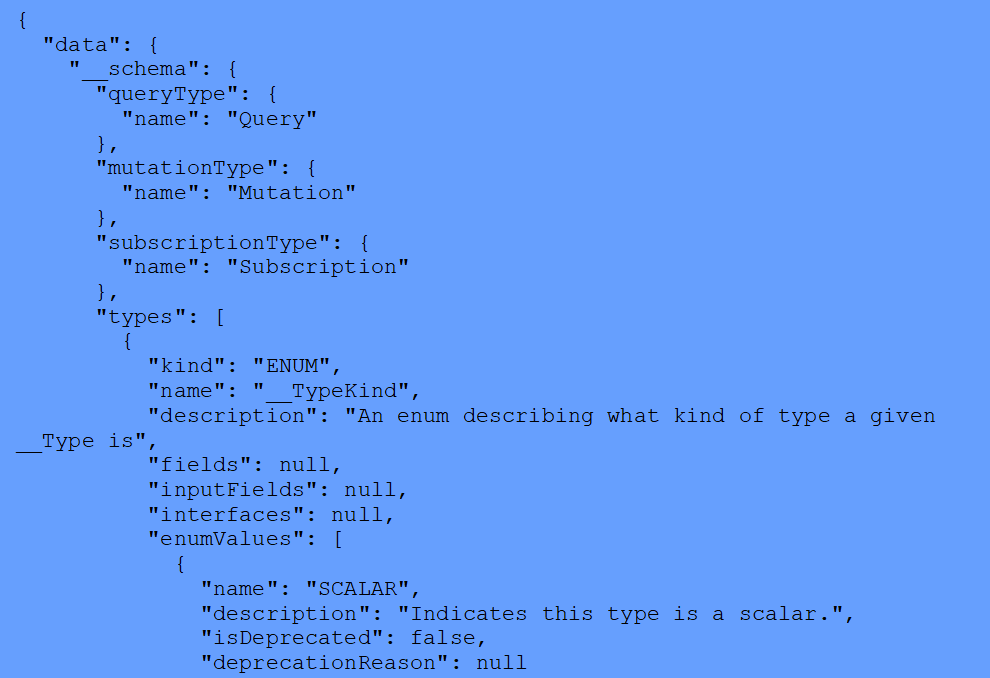
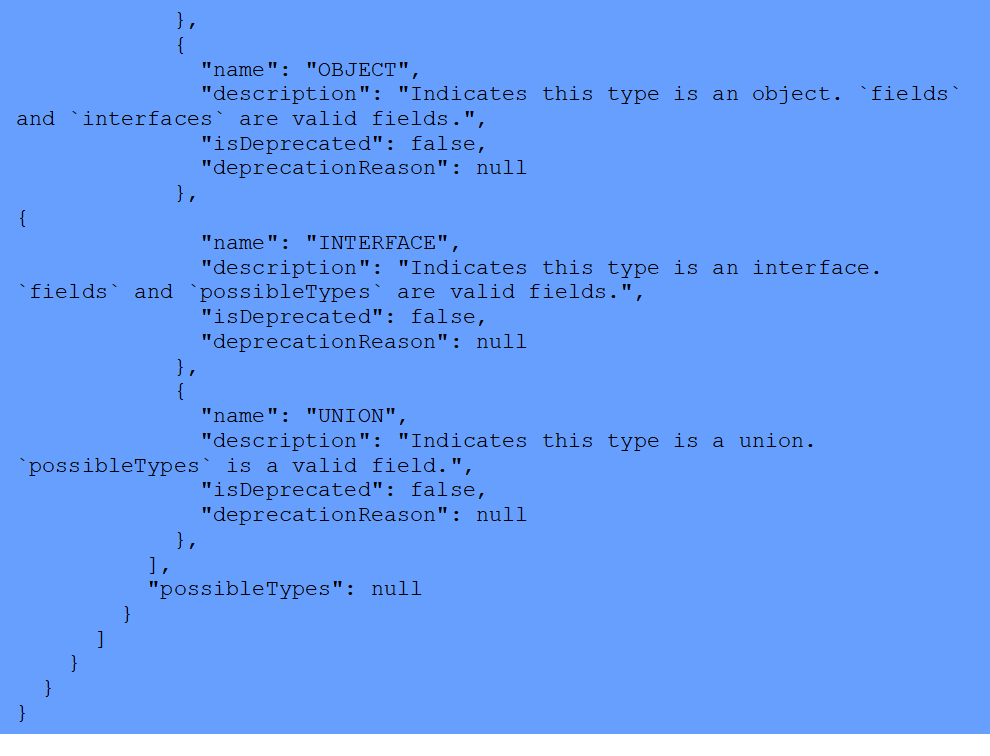
The result will usually be very long (and hence has been shortened here), and it will contain the entire schema of the GraphQL deployment.
Response:
A tool such as GraphQL Voyager can be used to get a better understanding of the GraphQL endpoint:

This tool creates an Entity Relationship Diagram (ERD) representation of the GraphQL schema, allowing you to get a better look into the moving parts of the system you’re testing. Extracting information from the drawing allows you to see you can query the Dog table for example. It also shows which properties a Dog has:
- ID
- name
- veterinary (ID)
There is one downside to using this method: GraphQL Voyager does not display everything that can be done with GraphQL. For example, the mutations available are not listed in the drawing above. A better strategy would be to use both Voyager and one of the methods listed below.
Using GraphiQL
GraphiQL is a web-based IDE for GraphQL. It is part of the GraphQL project, and it is mainly used for debugging or development purposes. The best practice is to not allow users to access it on production deployments. If you are testing a staging environment, you might have access to it and can thus save some time when working with introspection queries (although you can, of course, use introspection in the GraphiQL interface).
GraphiQL has a documentation section, which uses the data from the schema in order to create a document of the GraphQL instance that is being used. This document contains the data types, mutations, and basically every piece of information that can be extracted using introspection.
Authorization
Introspection is the first place to look for authorization problems. As noted, access to introspection should be restricted as it allows for data extraction and data gathering. Once a tester has access to the schema and knowledge of the sensitive information there is to extract, they should then send queries that will not be blocked due to insufficient privileges. GraphQL does not enforce permissions by default, and so it is up to the application to perform authorization enforcement.
Testing the authorization implementation varies from deployment to deployment since each schema will have different sensitive information, and hence, different targets to focus on.
In this vulnerable example, every user (even unauthenticated) can gain access to the auth tokens of every veterinarian listed in the database. These tokens can be used to perform additional actions the schema allows, such as associating or disassociating a dog from any specified veterinarian using mutations, even if there is no matching auth token for the veterinarian in the request.
Here is an example in which the tester uses an extracted token they do not own to perform an action as the veterinarian “Benoit”:
Request:

Response:
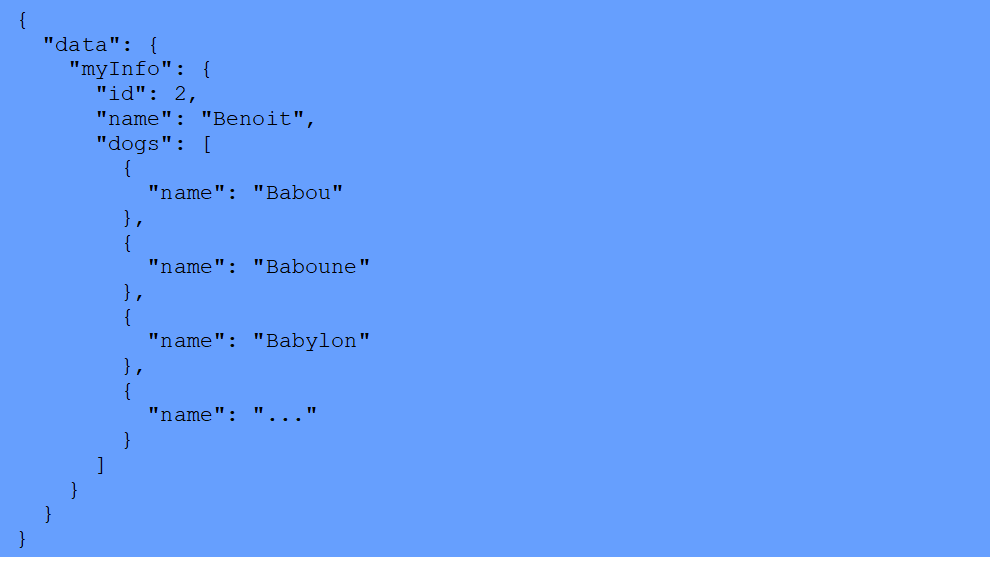
All of the Dogs in the list belong to Benoit, and not to the auth token owner. It’s possible to perform this type of action when proper authorization enforcement is not implemented.
Injection
GraphQL is the implementation of the API layer of an application, and as such, it usually forwards the requests to a backend API or the database directly. This allows you to utilize any underlying vulnerability such as SQL injection, command injection, cross-site scripting, etc. Using GraphQL just changes the entry point of the malicious payload.
You can refer to other scenarios within the OWASP testing guide to get some ideas.
GraphQL also has scalars, which are usually used for custom data types that do not have native data types, such as DateTime. These types of data do not have out-of-the-box validation, making them good candidates for testing.
SQL Injection
The example application is vulnerable by design in the query dogs(namePrefix: String, limit: Int = 500): [Dog!] since the parameter namePrefix is concatenated in the SQL query. Concatenating user input is a common malpractice of applications that can expose them to SQL injection.
The following query extracts information from the CONFIG table within the database.
Request:

Response:
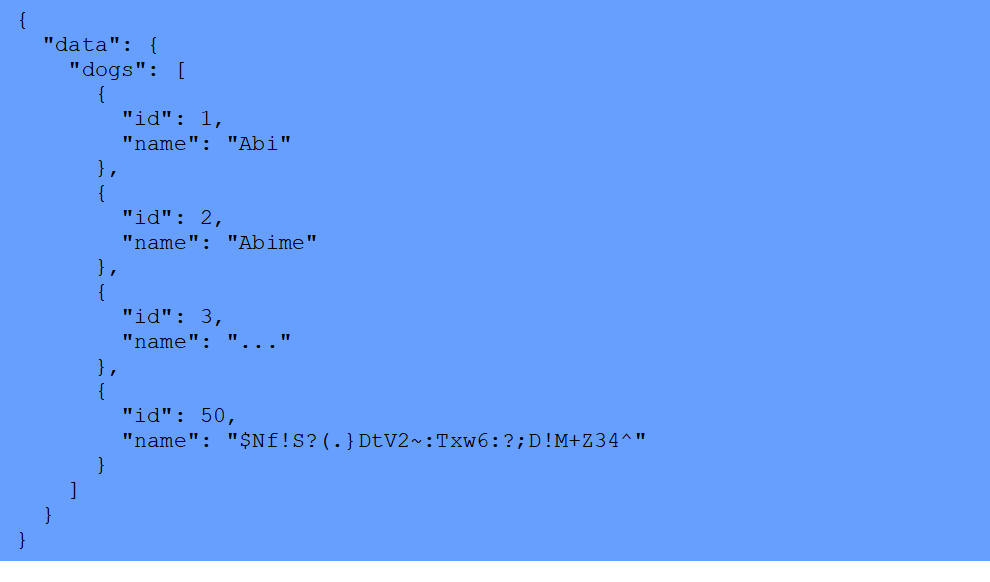
In order to know what to look for in any particular application, it will be helpful to collect information about how the application is built and how the database tables are organized. You can also use tools like sqlmap to look for injection paths and even automate the extraction of data from the database.
Cross-Site Scripting (XSS)
Cross-site scripting occurs when an attacker injects executable code that is subsequently run by the browser.
In this example, errors might reflect the input and could cause XSS to occur.
Payload:

Response:
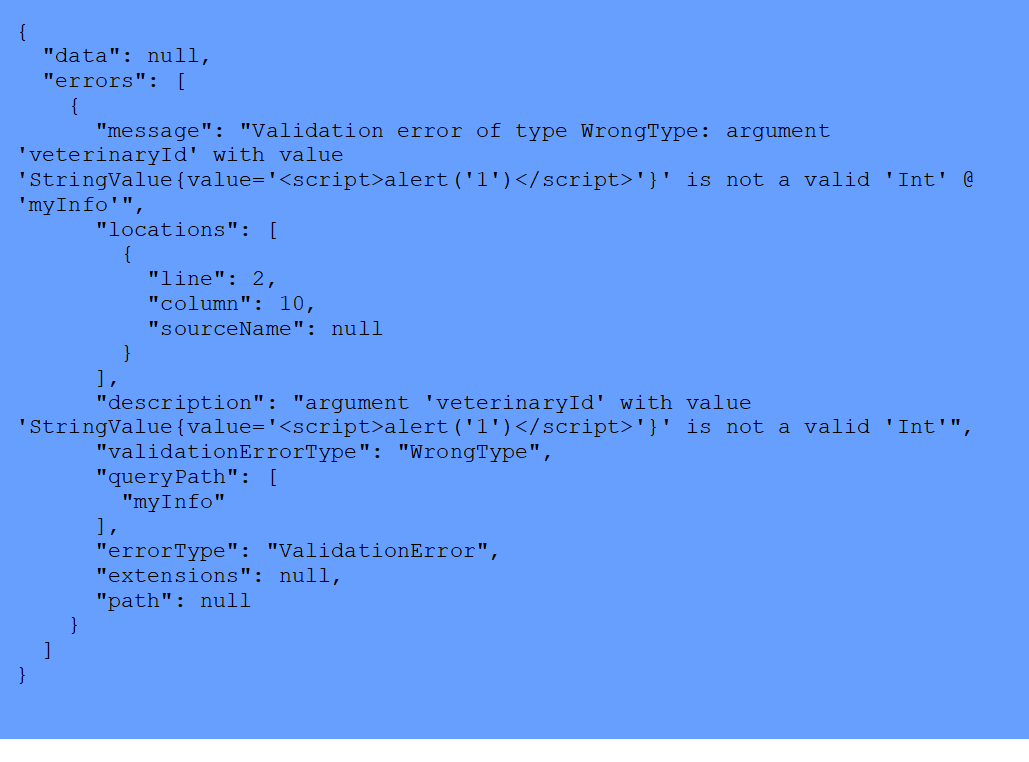
InQL Extension
PortSwigger released GraphQL Labs to help assist in learning the InQL extension utilized to work with GraphQL.
The lab description notes that the blog page contains a hidden blog post that has a secret password. To solve the lab, we must locate the hidden post while finding and entering the password.
Ensure you have the InQL extension loaded within Burp. The extension is available through the Bapp Store
Make sure to proxy traffic through Burp Suite Professional, and click “View Post” on any of the Blog posts included on the home page:

Navigate to Burp HTTP history to find the request to view the Blog:

Note that to view the blog post, a POST request is sent to the /graphql/v1 endpoint. With this newly discovered information, do the following:
- Send the request to Repeater
- Copy the URL and navigate to the InQL Scanner tab
- Paste the URL within the “URL or File” field InQL Scanner tab and press enter
InQL submitted an introspection request to the endpoint, and you should now have a list of the queries, mutations, and subscriptions. This will come in handy later!

Within the repeater , locate the request used to view the blog post. Note that the request is in JSON format. Click the InQL tab, and see how the extension beautifies the request, and removes formatting:

Finding the Hidden Blog Post
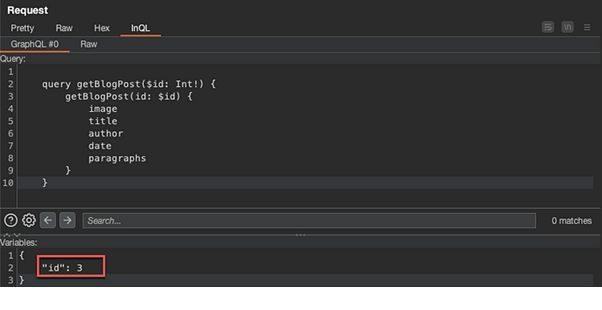
Notice within the POST request, the “id” variable is set to five (5). If you navigate back to the Home page, you will see there are only four (4) actual blog posts available to click.
Change the “id” variable to 4, and send the request. We will continue altering this variable until we locate the blog post that is not included on the Home page.
For this particular lab session, the “id” variable of three (3) gave the hidden blog post:
Discovering the Password
Venture back to the InQL Scanner tab and the revealed queries. The query utilized to retrieve a blog post was the getBlogPost.query. Clicking this will give us more information and fields for the query, one which includes the postPassword field:
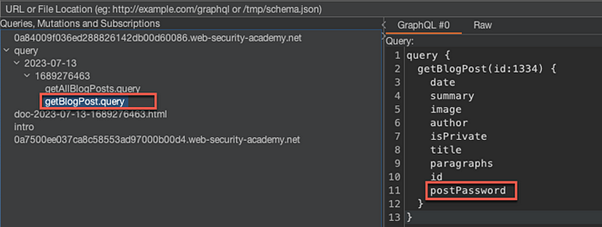
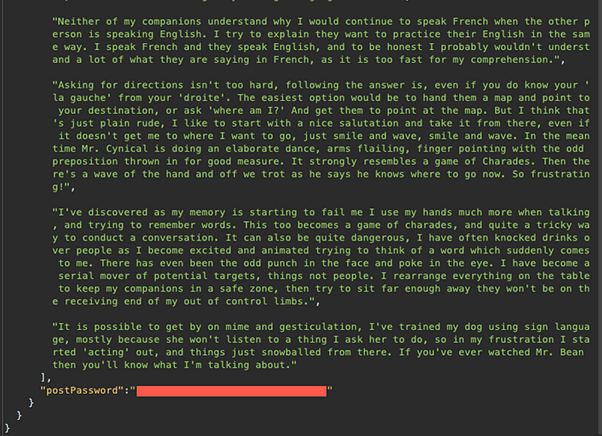
Go back to the same request for the hidden blog post in repeater, and, utilizing the InQL tab, put the postPassword field within the request:

Send the request, and note the password has been revealed in the response:
Remediation
- Restrict access to introspection queries.
- Implement input validation.
- GraphQL does not have a native way to validate input, however, there is an open source project called “graphql-constraint-directive” which allows for input validation as part of the schema definition.
- Input validation alone is helpful, but it is not a complete solution and additional measures should be taken to mitigate injection attacks.
- Implement security measures to prevent abusive queries.
- Timeouts: restrict the amount of time that a query is permitted to run.
- Maximum query depth: limit the depth of allowed queries, which may prevent queries that are too deep from abusing resources.
- Set maximum query complexity: limit the complexity of queries to mitigate the abuse of GraphQL resources.
- Use server-time-based throttling: limit the amount of server time a user can consume.
- Use query-complexity-based throttling: limit the total complexity of queries a user can consume.
Conclusion
Mastering GraphQL testing equips you with the knowledge to safeguard the integrity and stability of your API. By incorporating the comprehensive strategies outlined in this guide, you can:
- Proactively identify and address vulnerabilities before they become security breaches.
- Ensure the robustness and reliability of your GraphQL API, fostering trust and confidence among users.
- Streamline the development process by pinpointing potential issues early on, saving time and resources.
By embracing a proactive approach to GraphQL testing, you can empower a seamless and secure API experience for all stakeholders – Schedule a Meeting.


